½ cup (1 stick) unsalted butter: Softened to room temperature. Substitute: If you’re in a pinch, you can use high-quality vegetable shortening, but butter gives the best flavor.
1 ½ cups granulated sugar: For that perfect, sweet crumb.
3 large eggs: Room temperature is crucial here! They emulsify better with the butter.
2 teaspoons pure vanilla extract: Don’t skimp on the good stuff.
2 cups all-purpose flour: Substitute: You can use a 1:1 gluten-free baking flour if needed.
2 teaspoons baking powder: For that beautiful oven lift.
½ teaspoon salt: To balance the sweetness.
1 cup buttermilk: This provides the tang and tenderness. Substitute: If you don’t have buttermilk, add 1 tablespoon of white vinegar or lemon juice to a measuring cup, then fill the rest with regular milk. Let it sit for 5 minutes.
For the Warm Buttermilk Sauce:
½ cup (1 stick) unsalted butter
1 cup granulated sugar
¼ cup buttermilk
½ teaspoon baking soda: The secret ingredient that makes the sauce foam and thicken!
1 teaspoon pure vanilla extract
Step-by-Step Instructions
Let’s get baking! I promise this process is as relaxing as it is delicious.
1. Heat the Oven and Prep the Pan
Preheat your oven to 350°F (175°C). We want a nice, steady heat for that perfect golden crust. Lightly grease a 9×13-inch baking dish and line it with parchment paper, or just grease it well and dust it with a little flour.
2. Cream the Butter and Sugar
In a large mixing bowl, beat the softened butter and sugar together on medium-high speed for about 3 to 4 minutes. Science tip: Don’t rush this! Beating them together until they look pale and fluffy incorporates tiny air bubbles, which is what gives the cake its tender, light texture.
3. Add Eggs and Vanilla
Add the eggs one at a time, beating well after each addition. Mix in the vanilla extract. Scrape down the sides of the bowl to ensure everything is evenly combined.
4. Alternate Dry and Wet Ingredients
In a separate bowl, whisk together the flour, baking powder, and salt. Now, add the dry ingredients to the butter mixture in three parts, alternating with the buttermilk in two parts. Start and end with the dry ingredients. Mix on low speed just until the flour disappears. Do not overmix, or your cake will be dense!
5. Bake to Golden Perfection
Pour the batter into your prepared pan and smooth the top. Bake for 25 to 30 minutes. You’ll know it’s done when the top is a deep golden brown, the edges are pulling away from the pan, and a toothpick inserted into the center comes out clean.
6. Make the Buttermilk Sauce
While the cake is baking (or right when it comes out), place the butter, sugar, and ¼ cup buttermilk in a medium saucepan over medium heat. Stir gently until the butter melts and the mixture comes to a gentle boil. Let it boil for exactly 1 minute, then remove it from the heat.
Carefully whisk in the baking soda—it will foam up dramatically! Stir in the vanilla extract.
7. Poke and Pour
While the cake is still warm in the pan, use the handle of a wooden spoon to poke holes all over the top of the cake. Slowly pour the warm buttermilk sauce evenly over the cake, letting it seep down into all those little holes.
8. Cool and Serve
Let the cake sit for at least 30 minutes so it can absorb all that glorious sauce. Slice it up and serve it warm!
Pro Tips, Variations & Serving Ideas
Quick Tips for Success
Room Temperature is Non-Negotiable: If your butter, eggs, or buttermilk are cold, the batter will look curdled and won’t bake up as fluffy. Take them out of the fridge an hour before you start.
Watch the Sauce: When you add the baking soda to the hot buttermilk mixture, it will bubble up vigorously. Make sure you’re using a saucepan that’s large enough to handle the foam without spilling over!
Fun Variations to Try
Add a Crunch: Sprinkle ½ cup of finely chopped, toasted pecans over the top of the cake right after you pour the warm sauce. They will stick to the glaze and add a wonderful Southern crunch.
Fresh Berry Finish: Serve each slice with a handful of fresh macerated strawberries or raspberries on the side. The tartness of the berries cuts through the rich, buttery sauce beautifully.
How to Serve It (The Self-Serve Dessert Bar!)
Since I love desserts that can be easily customized and served in a relaxed format, this cake is perfect for a casual family gathering.
Because it stays incredibly moist, you can leave it in the baking dish on the counter, cover it loosely, and let guests help themselves. Set up a little dessert station alongside your coffee and tea. This cake pairs absolutely perfectly with a warm cup of dark roast coffee, a cozy chai tea, or even a glass of sweet Moscato. The warmth of the beverage melts the buttery sauce just a little bit more, creating an unforgettable bite!
Frequently Asked Questions
Q: Can I make this cake ahead of time?
A: Absolutely! In fact, many folks prefer it the next day. The longer the buttermilk sauce sits in the cake, the more moist and flavorful it becomes. Just cover it tightly and keep it at room temperature for up to 2 days, or in the fridge for up to 5 days.
Q: Why did my sauce separate or look greasy?
A: This usually happens if the heat was too high when making the sauce. You want a gentle boil, not a rapid, rolling boil. If it does separate slightly, don’t worry! Just give it a vigorous whisk off the heat, and it will come back together as it cools slightly.
Q: Can I use a boxed cake mix instead?
A: You certainly can if you’re in a time crunch! Bake your favorite yellow or vanilla boxed cake mix according to the package directions in a 9×13 pan, and then pour the homemade buttermilk sauce over it while it’s warm. It’s a fantastic, no-fuss shortcut that still tastes incredibly homemade.
Let’s Make Some Sweet Memories!
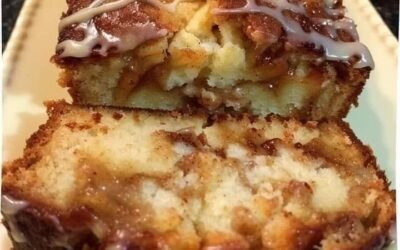
I truly hope this Classic Vanilla Butter Cake with Warm Buttermilk Sauce brings a little extra warmth, comfort, and nostalgia to your kitchen table. There is something so deeply satisfying about pulling a golden, fragrant cake out of the oven and watching your family’s eyes light up when they realize it’s a “poke cake” soaked in buttery goodness. It’s proof that the best desserts don’t need to be complicated; they just need to be made with a little patience and a lot of love.
If you try this recipe, I would absolutely love to hear how it turned out for you! Did you stick to the classic vanilla, or did you add some toasted pecans on top? Drop a comment below to let me know, and please share this recipe with a friend who could use a comforting, crowd-pleasing dessert idea this week. Happy baking, and I’ll see you in the kitchen!
For Complete Cooking STEPS Please Head On Over To Next Page Or Open button (>)